")
How to measure intraocular pressure: applanation tonometry
Related content
All adults attending an eye unit should have their intraocular pressure (IOP) measured, unless there is a contraindication (e.g. trauma or corneal ulcer). Many people with glaucoma have no symptoms and do not know they have the condition. All children who have had cataract surgery should also have their IOP measured at every follow-up visit, if possible. Finding glaucoma early allows treatment to be given which will preserve sight. Although elevated IOP is not the only sign of glaucoma, measuring it is simple and quick to do. It should therefore be done routinely on all adults attending eye care facilities. Applanation tonometry, described in this article, is the preferred method (the ‘gold standard’). Schiötz tonometry, which will be described in a future issue, can also be used to measure intraocular pressure and is a useful screening test.
Equipment
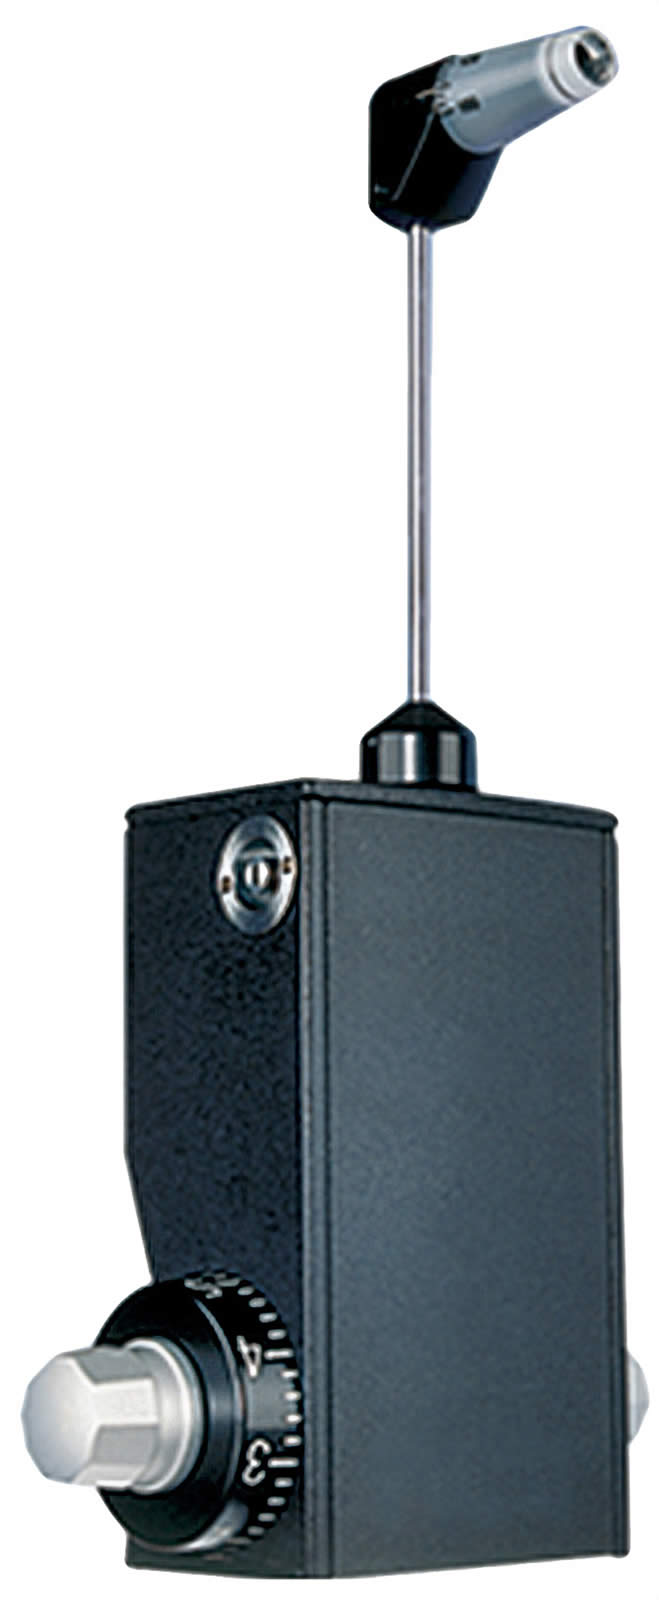
- Tonometer, either Goldmann (used on slit lamps) or Perkins (hand-held)
- Applanation prism
- Local anaesthetic drops
- Fluorescein strips
- Clean cotton wool or gauze swabs.
Preparation
- Ensure the prism has been disinfected with isopopyl alcohol 70% (methylated spirit) or sodium hypochlorite 1%. The prism must be rinsed in sterile water and wiped dry with a clean swab (residue of the disinfectant may cause a caustic burn on the cornea).
- Check that the graduation marked ‘0’ on the measuring prism is aligned with the white marker point on the tonometer head
- Check the calibrated dial of the tonometer is set at 10 mmHg
- Ensure that the patient is sitting comfortably at the slit lamp: at the right height, with their chin on the rest and their forehead against the headband (or in a chair with their head supported, if using the Perkins tonometer)
- Set the magnifcation of the slit lamp at ×10.
Method
- Instil the local anaesthetic drops and then the fuorescein. Only a very small amount of fuorescein is needed
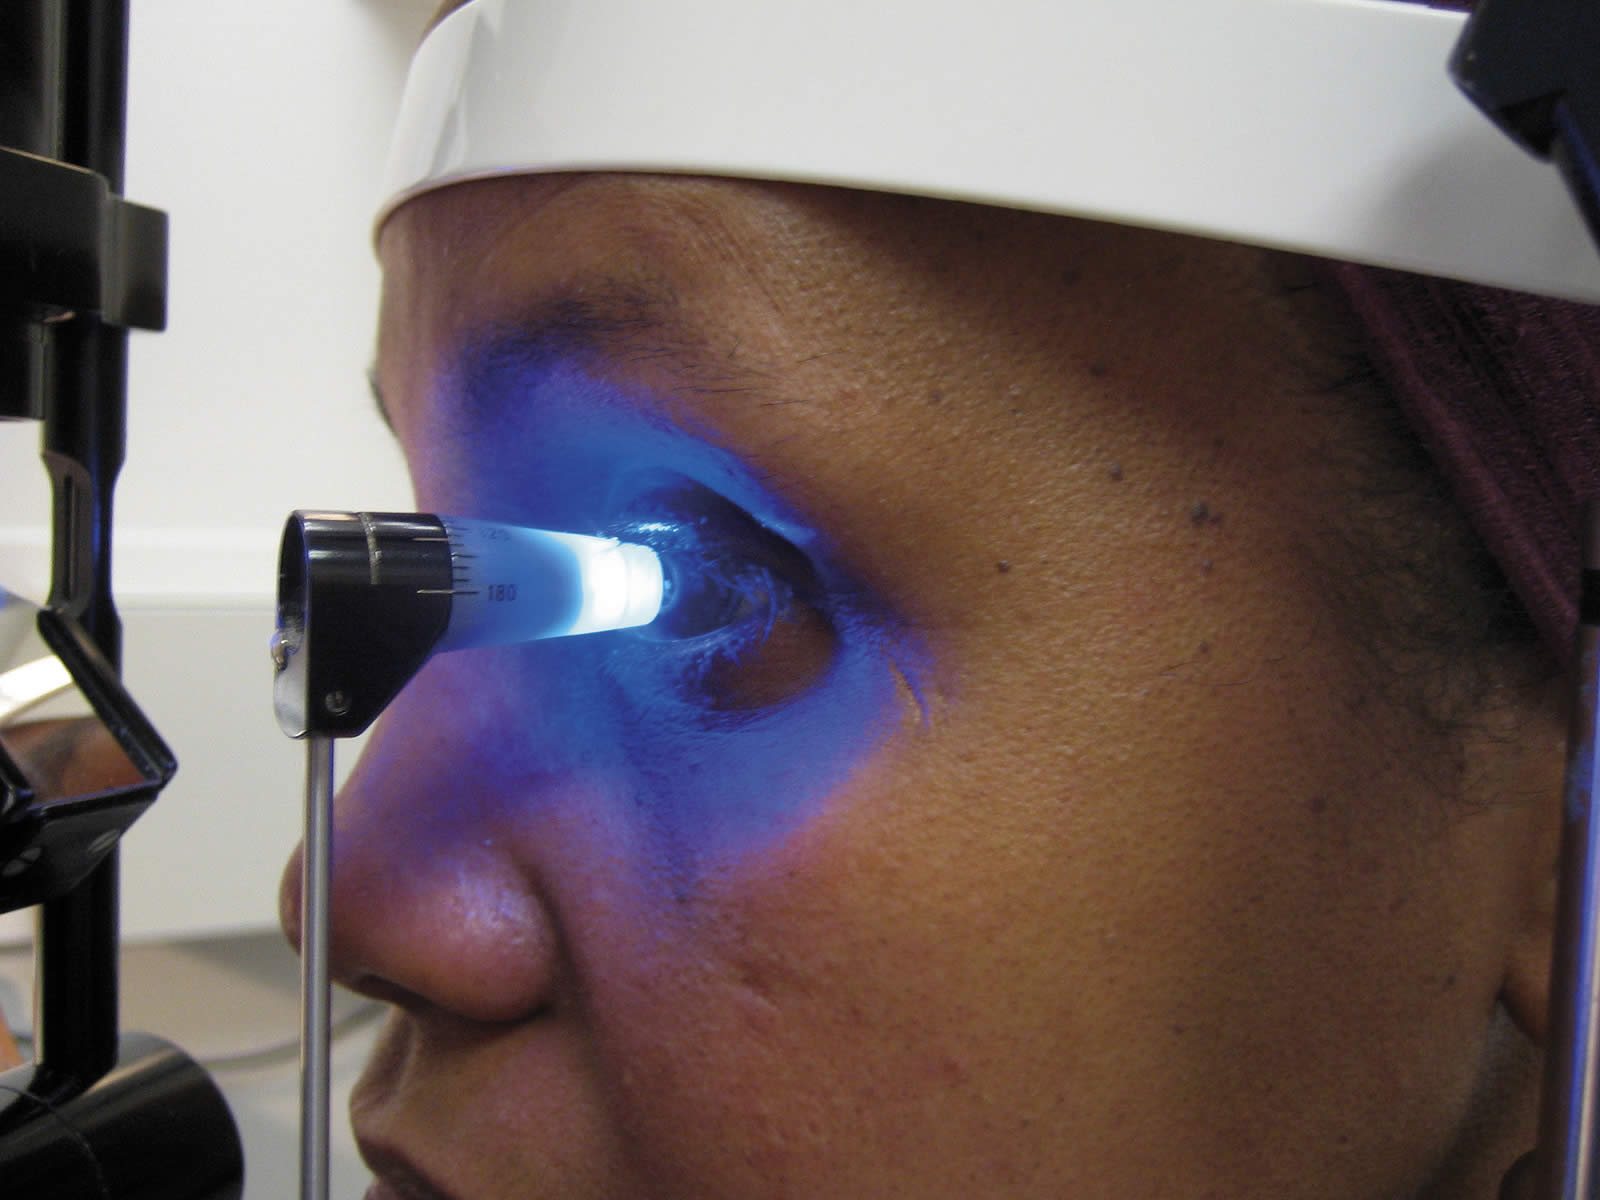
- For measuring the IOP in the right eye, make sure the slit beam is shining onto the tonometer head from the patient’s right side; for the left eye, the beam should come from the patient’s left side
- Move the filters so that the blue filter is used to produce a blue beam
- Make sure the beam of light is as wide as possible, and that the light is as bright as possible. This makes visualising the fluorescein rings easier (with the slit diaphragm fully open)
- Ask the patient to look straight ahead, open both eyes wide, fix his or her gaze and keep perfectly still
- With the thumb, gently hold up the patient’s top eyelid, taking care not to put any pressure on the eye
- Direct the blue light from the slit lamp or the Perkins tonometer onto the prism head
- Make sure that the tonometer head is perpendicular to the eye
- Move the tonometer forward slowly until the prism rests gently on the centre of the patient’s cornea
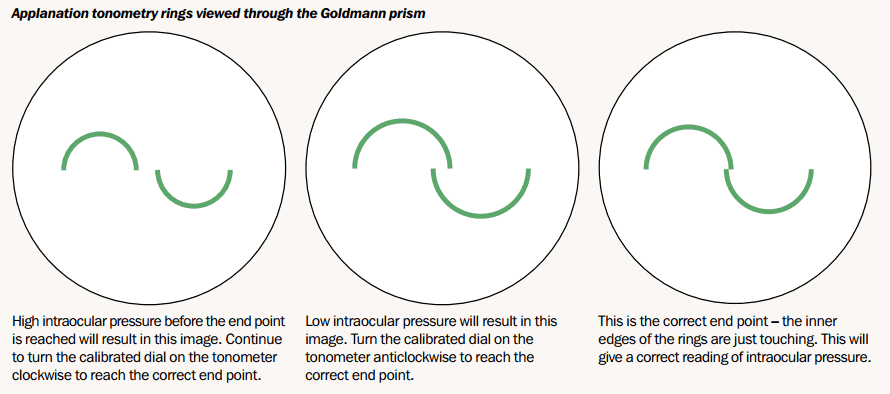
- With the other hand, turn the calibrated dial on the tonometer clockwise until the two fluorescein semi-circles in the prism head are seen to meet and form a horizontal ‘S’ shape. (Note: the correct end point is when the inner edges of the two fluorescein semi-circle images just touch)
- Note the reading on the dial and record it in the notes
- Withdraw the prism from the corneal surface and wipe its tip
- Repeat the procedure for the other eye
- Wipe the prism with a clean, dry swab and replace it in the receptacle containing the disinfectant.
Applanation tonometry rings viewed through the Goldmann prism
Calibration of the Goldmann tonometer
- It is possible to check the calibration of the tonometer; this should be done every six months. Calibration is done at dial positions 0, 2, and 6 (equivalent to 0, 20, and 60 mmHg)
- Insert the prism in the holder and place the tonometer on the slit lamp
- At dial position 0, the feeler arm should be in free movement. If the dial is turned backwards a small way (to the equivalent of position -0.05), the arm should fall towards the examiner. If the dial is turned forwards a small way (to the equivalent of position +0.05) the arm should fall towards the patient
- If the arm doesn’t respond in the above way, the tonometer is inaccurate at dial position 1
- To check dial positions 2 and 6, the check weight is used (this is normally found in the case with the tonometer prisms or in the drawer of the slit lamp). There are five markings engraved on the bar. These represent 0 centrally, then 2 on either side, and 6 towards the edges
- Line up the adjustable holder with index mark 2 on the weight. With the longer end of the bar facing you, put it into the slot on the side of the tonometer and push it all the way in
- Repeat the above steps (for dial position 0), with the dial now at position 2. This time, turn the dial backwards to the equivalent of 1.95 and forwards to the equivalent of 2.05
- To check dial position 6, move the weight bar to the end position. Repeat the steps at dial position 6, turning the dial backwards to the equivalent of 5.9 and forwards to the equivalent of 6.1
- If the tonometer is inaccurate at any of these dial positions, it should be returned to the manufacturer for recalibration.