")
Basic microsurgical skills: suturing

Related content
Operating under magnification is a challenging but vital skill that all ophthalmologists must develop.
From repairing an open globe, to suturing a rectus muscle, or closing a trabeculectomy flap, basic suturing using a microscope (or loupes) is an essential skill.
The tools of microsurgery
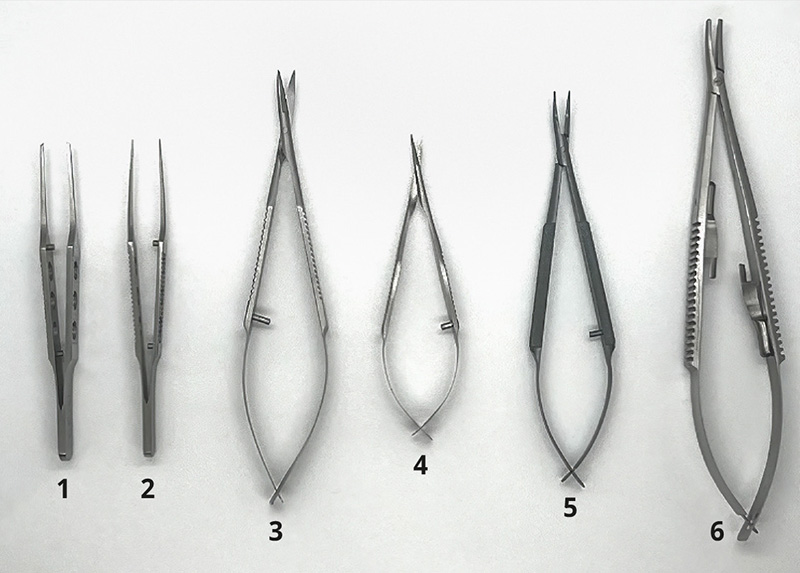
Since ocular tissues are so delicate, it is important to use instruments safely and to select the correct instrument for each task (Figure 1). For example, toothed forceps are designed for grasping tissue, while non-toothed forceps have a tying platform that enables the surgeon to grip suture material.
| Instrument | Features | Example of use |
|---|---|---|
| 1 – St Martin forceps | Fine-toothed (micro-notched) tip | Gripping corneal tissue |
| 2 – Suture tying forceps | Flat tying platform | Handling suture material |
| 3 – Westcott curved scissors | Rounded, with blunt tips | Conjunctival peritomy |
| 4 – Vannas straight scissors | Fine, with sharp tips | Cutting corneal sutures |
| 5 – Barraquer needle holders | Round handle | Holding 10/0 suture needle for corneal sutures |
| 6 – Castroviejo needle holders | Flat handle, locking | Skin suturing |
Instruments are usually held as a pen would be (Figure 2). Fine movements are made using the fingers and wrist, with the hand resting to stabilise the motion.1
Sutures vary by needle type and suture material. Choice of suture depends on the type of tissue, strength and duration of wound support required. There are absorbable and non-absorbable sutures, which may be monofilament or multifilament (braided). Common sutures include:
- Vicryl (polyglactin), an absorbable suture which provides tissue support for 21 days, but induces inflammation as it is absorbed by hydrolysis reaction
- Ethilon (nylon), a non-absorbable suture, which would need removal if no longer required to support wound healing
- Prolene (polypropylene), also a non-absorbable suture.
It is generally best to use the thinnest suture suitable to accomplish the task. For example, 10-0 is preferable for corneal suturing, 8-0 for conjunctival suturing, and 6-0 for skin or tarsal plate suturing and reattaching rectus muscles.
The type of suturing needle can vary as follows:
- By cross-section of the needle, which affects the cutting planes of the needle
- By curvature arc of the needle, with the 3/8 circle needle being most commonly used.
Corneal suturing
Corneal suturing is a core microsurgical skill. In low- and middle-income countries, it is usually one of first types of microsurgical suturing skills many trainees will learn.
Corneal suturing is needed to repair traumatic corneal lacerations and, on occasion, cataract surgery incisions.
A 10/0 nylon suture is usually used for corneal suturing. The suture needle must be handled with care, as grasping the tip will blunt the needle, and grasping the swage may cause the suture material to detach from the needle. Further detail on the anatomy of the suture and handling the needle safely can be found in the article on passing sutures, in this issue.
Interrupted sutures are the first type a trainee surgeon is likely to learn. The 3-1-1 technique described in Figure 3 produces a firm knot that is small enough to be buried by rotating the knot into the corneal tissue. This is more comfortable for the patient, and less likely to form a focus for infection. Note: when making more than one interrupted suture, ensure they are equally spaced and of equal length.
The images used to illustrate these steps were adapted from the video ‘Repair of a corneal laceration’ on simulatedocularsurgery.com, 1 and show a surgeon practising interrupted corneal suturing on an artificial eye.
Figure 3 The 3-1-1 technique for interrupted sutures © Taken from video “Repair of a corneal laceration” on “simulatedocularsurgery.com”
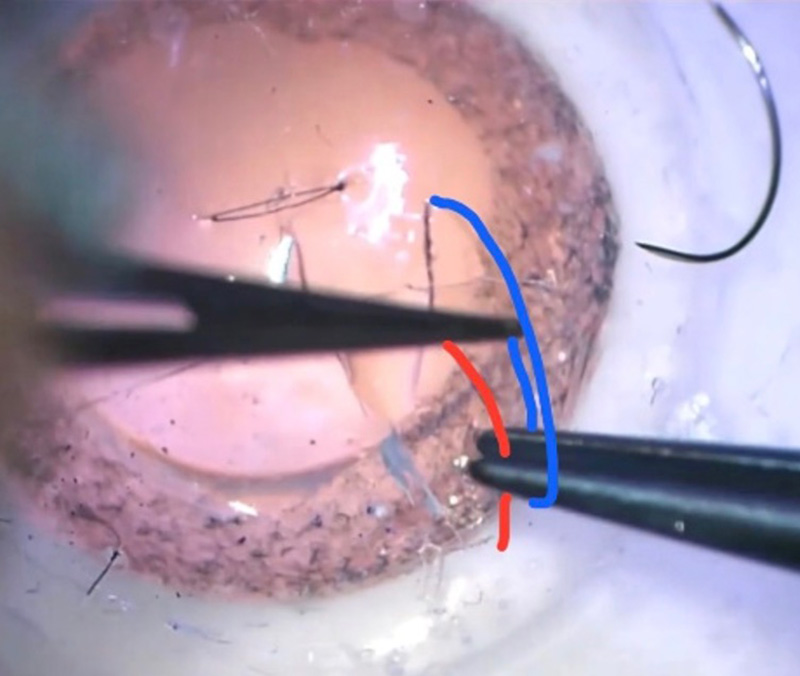
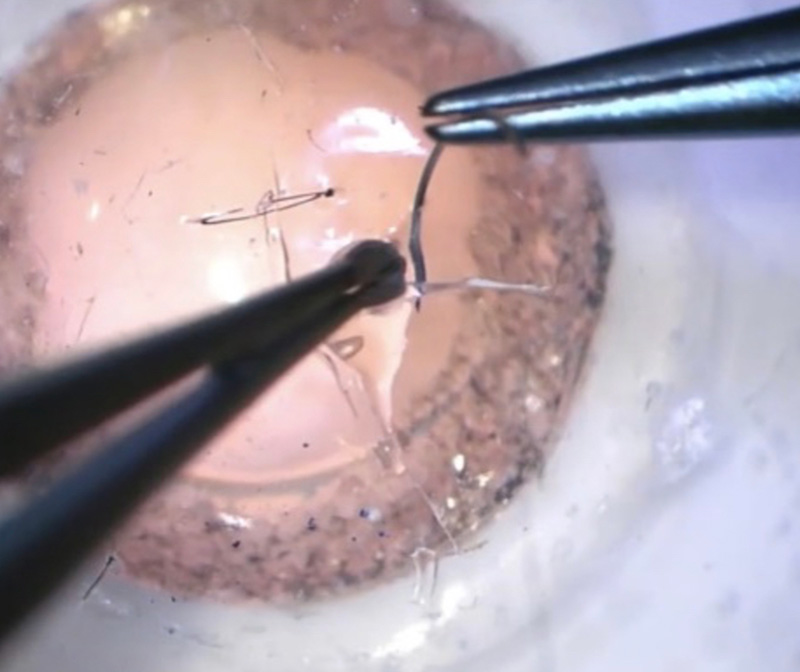 Step A – Using St Martins fine-toothed (micro-notched) forceps, evert the distal lip of the wound (the lip furthest away from the surgeon). Pass the needle from outside the wound to inside (at a stromal depth of two thirds) by rotating through the distal lip of the cornea. The needle should enter the cornea perpendicular to the corneal surface edge. |
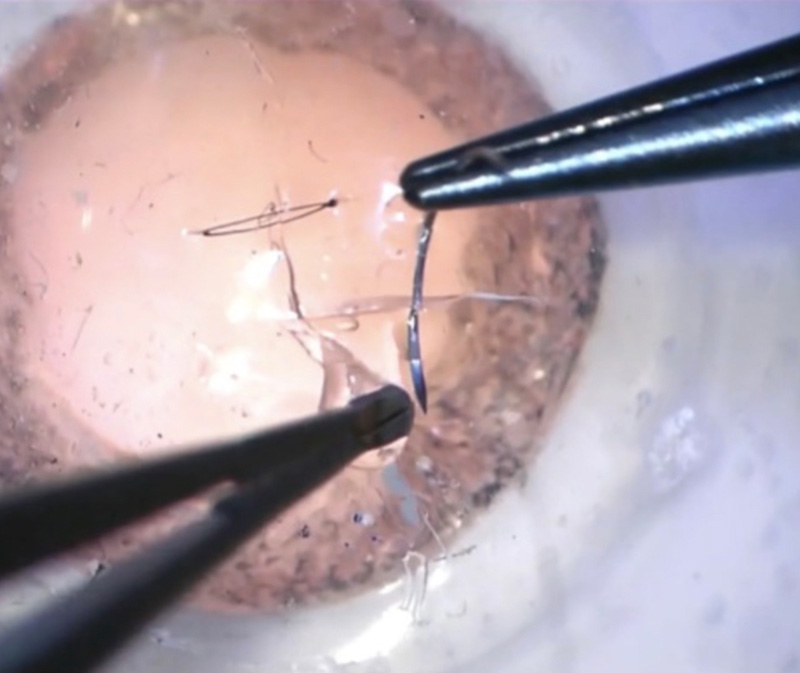 Step B – The needle should exit the cornea perpendicular to the corneal surface. To do this, gently grasp the proximal lip (nearest the surgeon) with the forceps. Push the needle into the proximal lip, directly opposite the exit from the distal lip, at an equivalent depth. Push and rotate the needle through the proximal lip, with gentle pressure on the lip to assist, then pull and rotate the needle once it is through the tissue, without touching the tip. |
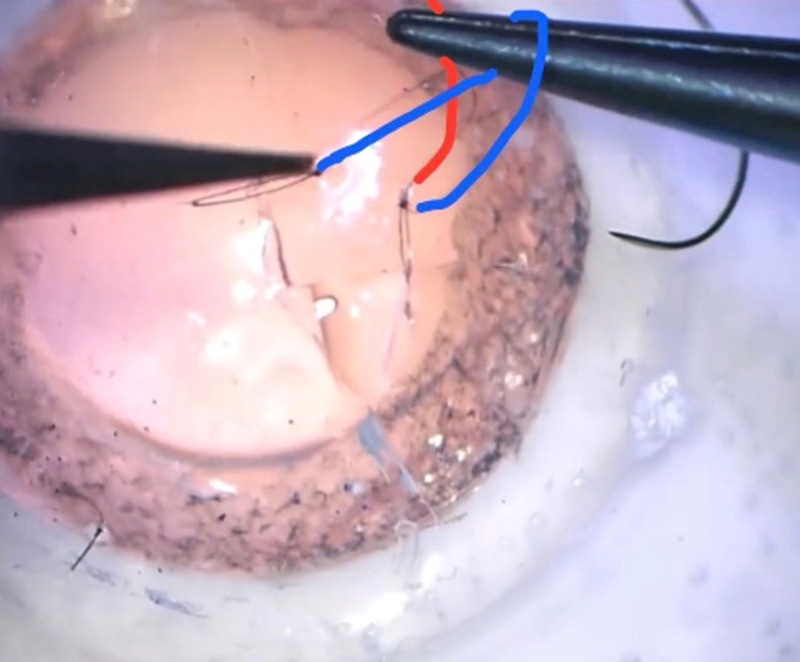
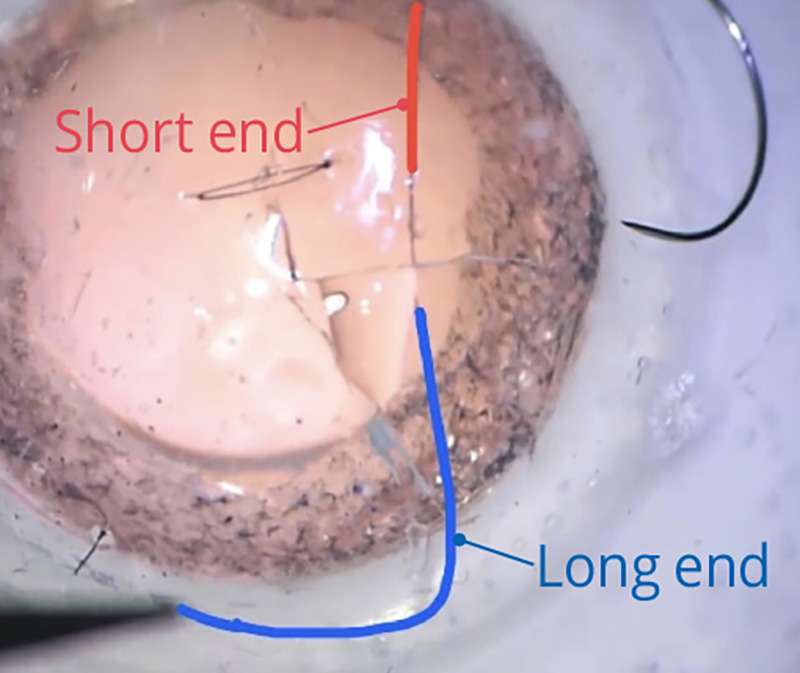 Step C – The suture should now be perpendicular to the wound, with entry and exit points equally spaced. To enable you to tie a secure knot, pull most of the length of the suture through the tissue, leaving a short end (highlighted in red in the image) and a long end (highlighted in blue). |
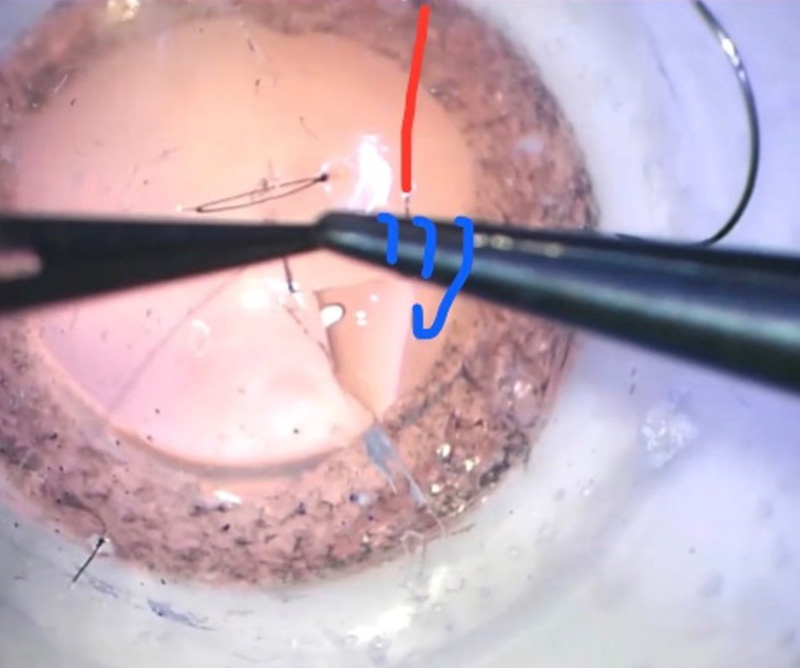 Step D – Holding the long end (blue) with tying forceps at a short distance from the cornea, wrap the long end around the needle holder three times. With these three loops on the needle holder, grasp the short end of the suture (red), on the opposite side of the wound. |
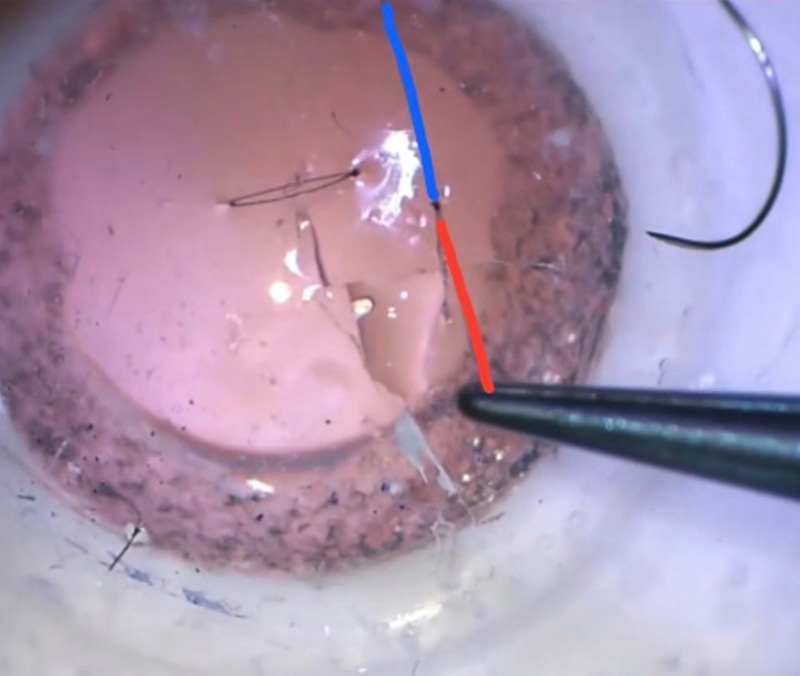
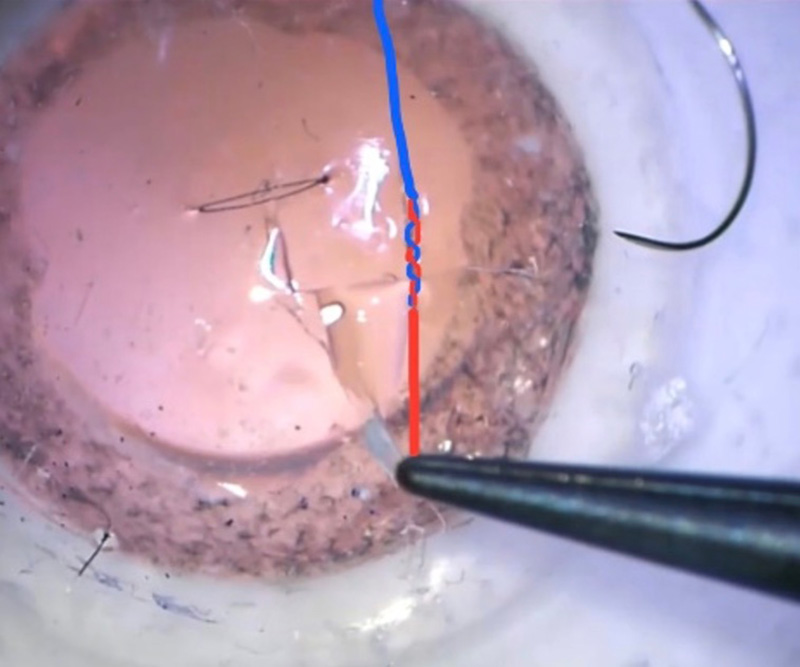 Step E – Pull the short end through the three loops and pull it down snugly towards the wound. This should have enough tension to bring the two wound edges together, without distorting the tissue. |
 Step F – Next, loop the long end of the suture once around the needle holder, this time in the opposite direction (if the 3 loops were made wrapping towards yourself, then now wrap away from yourself). |
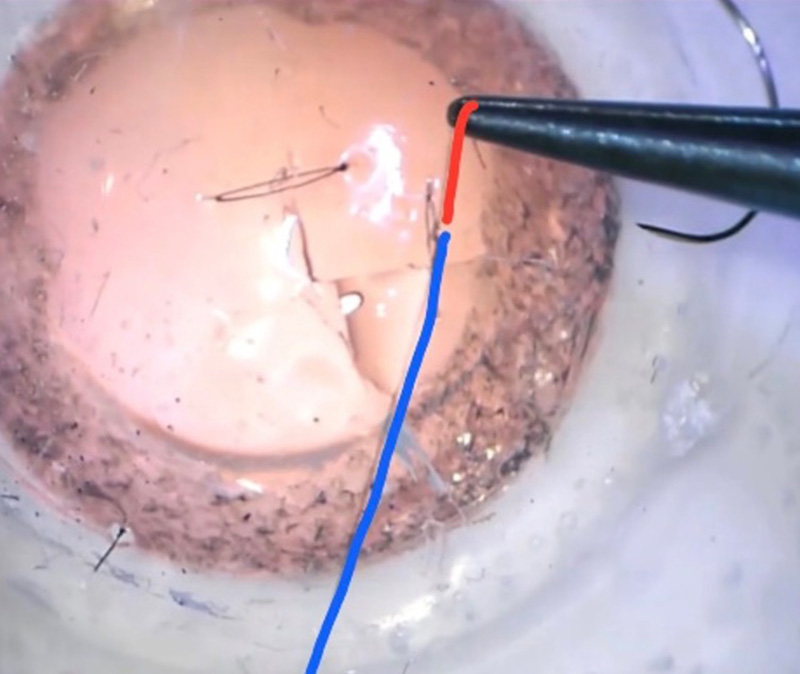 Step G – Grasp the short end of the suture (red) and pull it through the single loop. Tighten this down snugly towards the wound to lock your suture in place. |
 Step H – Make one more single loop around the needle holder using the long end of the suture (blue), in the same direction as the first three loops (as shown in Step D), then grasp the short end (red). |
 Step I – Make one more single loop around the needle holder using the long end of the suture (blue), in the same direction as the first three loops (as shown in Step D), then grasp the short end (red). |
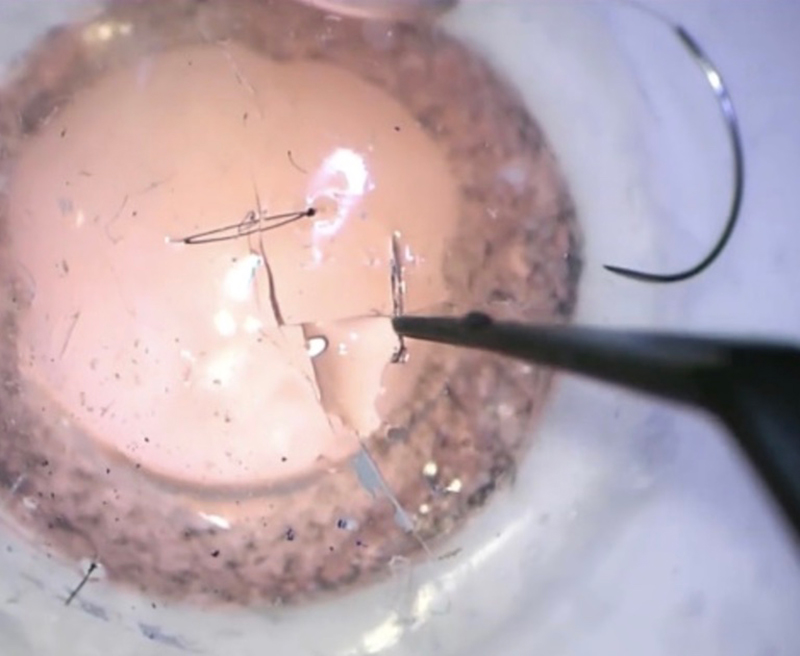 Step J – Bury the knot by rotating the it into the corneal tissue. This is much more comfortable for the patient, and less likely to form a focus for infection |
Practice, practice, practice
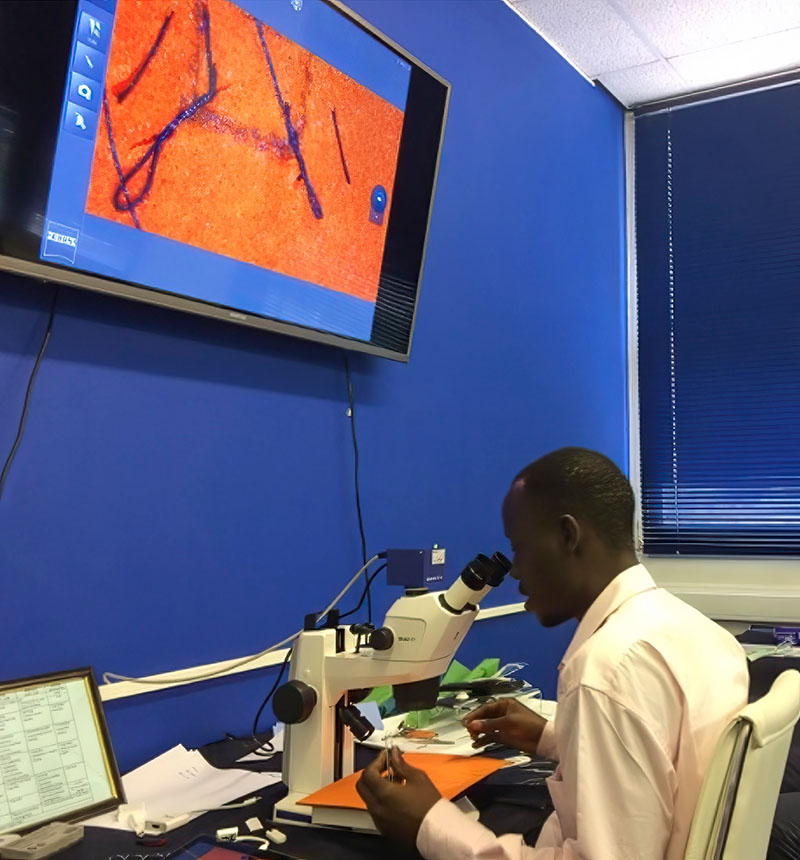
Each of these steps can be perfected in a simulated environment, prior to operating on a patient. Operating microscopes or portable training microscopes may be used to practise corneal suturing (Figure 4).2 Model eyes are available to practise these skills, but foam (even that used in the suture packaging) can also be a good medium to simulate corneal tissue. If a microscope is not available, the same suturing techniques can be practised on a larger scale using 7-0 sutures and the naked eye.
Eyelid laceration repair can be performed without use of a microscope. Silicone suturing pads or fruit (such as banana peel) may be used to replicate eyelid tissue. The use of animal models has also been validated, for example Pfaff’s use of a split pig head model to teach eyelid margin repair.3 Guidance for practicing eyelid closure using simulation is also available on: http://oculoplastics.info/video/thebasics/eyelid-margin-closure
Feedback
Simulation practice can be enhanced by peer or supervisor feedback, in addition to self-reflection using assessment rubrics. A useful tool called the Ophthalmic Simulated Surgical Competency Assessment Rubric (OSSCAR) has been created to assess various ophthalmic procedures, including corneal laceration repair.4 By comparing their attempt to the assessment rubric, the trainee surgeon can identify areas for improvement. This may be augmented by video recording their practice sessions.
Beginning with simple linear corneal lacerations, the complexity of surgical techniques can be increased by creating irregular, shelved or stellate lacerations and by practising both right- and left-handed. Once interrupted sutures are mastered, trainees may progress to butterfly, purse-string or continuous sutures.
Useful videos
These videos all demonstrate a good technique for corneal suturing.
Corneal suturing, by Derek Ho
How to suture a corneal laceration, demonstrating 3-1-1 and slipknot techniques, on a model eye. https://bit.ly/Corneal_Ho
How to suture a phaco incision, by Cataract Coach.com
Video of live surgery demonstrating how to suture a cataract surgery incision using a 10-0 nylon suture. https://bit.ly/47bhmjL
Keys to Corneal Suturing, by Christopher J Rapuano
Video demonstrating key tips for corneal laceration repair, using a pig’s eye. https://bit.ly/3MKzAAr
References
1 Ferris, J. (2017) Repair of a corneal laceration. Simulated Ocular Surgery. Available at www.simulatedocularsurgery.com
2 Ezra DG, Aggarwal R, Michaelides M, Okhravi N, Verma S, Benjamin L, Bloom P, Darzi A, Sullivan P. Skills acquisition and assessment after a microsurgical skills course for ophthalmology residents. Ophthalmology. 2009;116(2):257-62.
3 Pfaff AJ. Pig eyelid as a teaching model for eyelid margin repair. Ophthalmic Plast Reconstr Surg. 2004;20(5):383-4.
4 Jones, R. (2022). Ophthalmic Simulated Surgical Competency Assessment Rubric: Corneal laceration repair. Simulated Ocular Surgery. PDF available at: https://bit.ly/osscar-cornea